.png)
When it comes to building a house in Singapore, there’s more to consider than just floor plans and finishes. Many homeowners are realising the value of tapping into Singapore’s abundant sunlight to power their homes.
By planning for solar from the start, you unlock long-term energy savings, boost property value, and build a more sustainable lifestyle. But integrating solar into the construction process may feel daunting.
Here’s everything you need to know.
What Are The Key Considerations When Building A House In Singapore?
Here are the most important factors to consider when building a house in Singapore to ensure a smooth solar installation process.
How Should You Design Your Roof for Solar Installation?
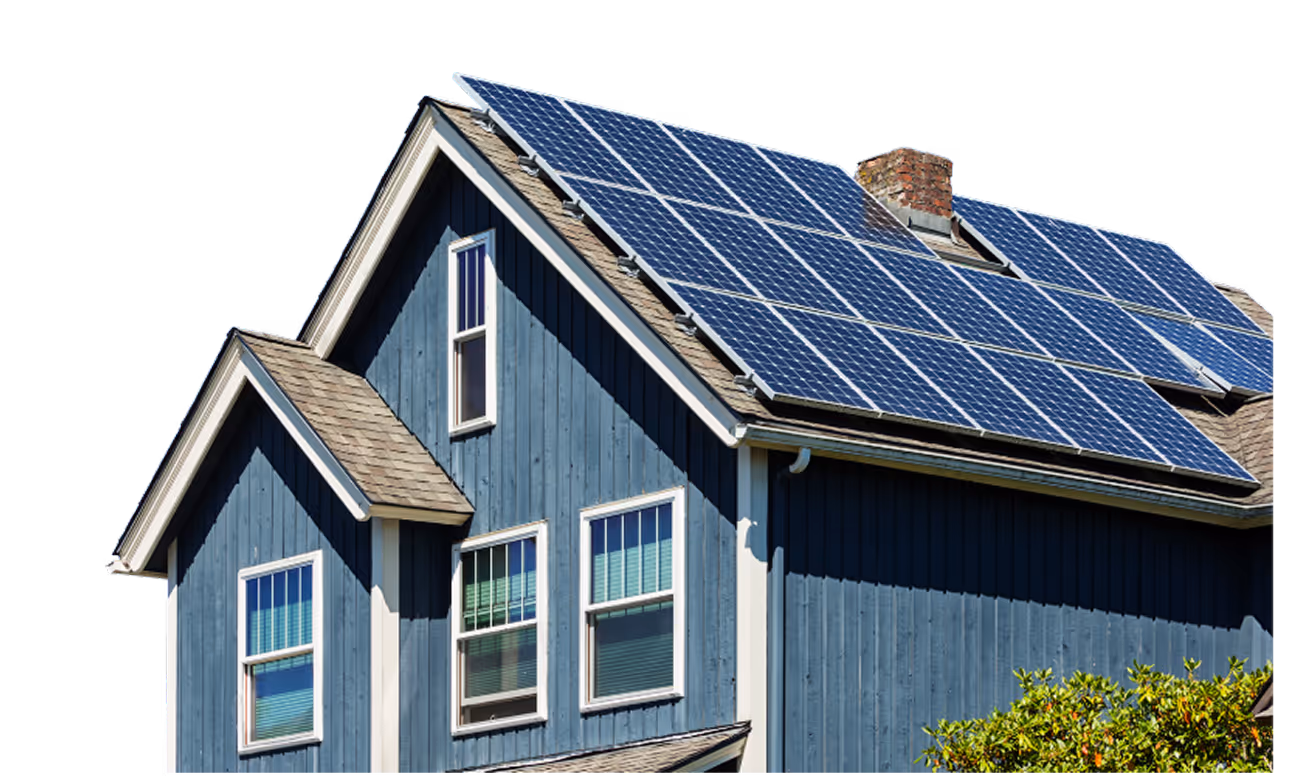
If you’re building a house in Singapore, an optimal roof structure is critical for solar panel installation.
Your roof should be as unobstructed as possible to maximise the number of panels installed in a single setup. This reduces your cost per kilowatt-peak (kWp), as manpower can account for up to 50% of system costs.

The best way to achieve this is to place obstacles (vent pipes, skylights, etc.) to the side rather than the middle of the roof. If that’s not possible, cluster them together instead of dispersing them.
What Is the Best Roof Material for Solar Panels in Singapore?
While building a house in Singapore, choose the right roof material to minimise additional modifications later.
Ideally, your roof should be either a standing seam metal roof or a concrete roof. These require no penetration when installing solar panels for your home.

For other roof types, the installation method varies—check out our step-by-step solar installation guide for Singapore to learn best practices for tiles vs metal roofs, waterproofing, and more.
What Is the Ideal Roof Angle for Solar Panels in Singapore?
To maximise the amount of sunlight your solar panels receive, your roof tilt should not exceed 30 degrees. Flat roofs or those with around a 10-degree tilt are most optimal.

When it comes to roof direction, this generally doesn’t matter in Singapore as the country sits near the equator.
You can read more about how roof angle and direction affect solar performance in Singapore.
Why Is Easy Roof Access Important for Solar Installation?
When building a house in Singapore, having easy roof access simplifies both installation and maintenance.
This can save on scaffolding and make it much easier to maintain your solar panels in the future.
A vertical access ladder or open attic balcony that allows direct roof access will suffice.
Should You Add a 3-Phase Sub Distribution Board Box on the Attic Floor?
This isn’t essential, but having a 3-phase sub distribution board box (sub DB box) on the attic floor is ideal.
By connecting your inverter directly to the sub DB box upstairs, you reduce cable length, lower transmission losses, and make wiring easier to conceal.
Learn more about three-phase and neutral distribution boards here.
What Are the Design Considerations Before Solar Installation?
Where Should You Place Your Inverter?
Your inverter should be wall-mounted in a well-ventilated, sheltered area—away from direct sun and rain.
Most homeowners place it at the attic balcony area to minimise cable loss between the solar panels and inverter.

Can Solar Panel Wiring Be Concealed in Singapore Homes?
While wiring between panels and inverter is usually exposed, wiring between inverter and DB box can often be concealed.
Before installation, your solar installer will discuss cable paths and whether any exposed trunking is needed. If your DB box is on the ground floor, positioning the AC isolator within the inverter’s premises helps keep cables neat and hidden.
What Is the Timeline for Solar Installation When Building a House in Singapore?
When Should You Start Looking for a Solar Installer?
We recommend engaging a solar installer around 6 months before receiving your Certificate of Statutory Completion (CSC) or Temporary Occupation Permit (TOP).
This allows enough time to finalise system design, inverter placement, and cabling provisions.
Meanwhile, you can explore our solar price plans in Singapore—including Rent-To-Own options with zero upfront cost, free installation and maintenance, and guaranteed savings.
When Can Solar Panels Be Installed on a New House?
Solar installation can only begin after your CSC or TOP is issued. Installing earlier would complicate approvals due to SP Group’s separate solar commissioning process.
Once approvals are in place, installation typically takes 3–7 days.
How Long Does Solar Commissioning Take in Singapore?
After installation, SP Group needs to commission your system. A bidirectional meter will be installed to track electricity imported and exported to the grid.
This usually takes 2–4 weeks, but during peak times it may extend up to 3 months.
How To Integrate Solar Solutions When Building a House in Singapore
Installing solar as a new homeowner may feel daunting, but with the right planning, it can be smooth and straightforward.
If you delay solar installation, that’s perfectly fine too. Just note that depending on your DB box location, some cabling may need to run externally.
If you’re exploring solar now, try our instant solar assessment tool to estimate your home’s solar potential.
You can also review different solar price plans in Singapore, including zero upfront Rent-To-Own options that cover maintenance and guarantee performance.
Rent-to-Own Solar for Business with Guaranteed Performance
Immediate ROI


Rent-to-Own Solar. $0 Upfront cost. Guaranteed Savings
(10-Year RTO plan)
+ 10-Year Free Maintenance

Be part of The Solar Collective, where we share the latest updates, tips, and discussions on solar energy.